Difference between revisions of "Windows Storage Node"
m (→Fog Web GUI) |
m (→Requirements) |
||
| Line 4: | Line 4: | ||
==Requirements== | ==Requirements== | ||
#Windows Server 2008 (R2)/Windows Server 2012 (R2) | #Windows Server 2008 (R2)/Windows Server 2012 (R2) | ||
| − | #NFS Role Installed | + | #NFS Role Installed (NFS) |
| − | #Filezilla Installed | + | #Filezilla Installed (FTP) |
==Windows Step-by-Step== | ==Windows Step-by-Step== | ||
Revision as of 18:43, 17 December 2014
Contents
Windows Storage Node
- This has been put together from the forum and should be useful to many. Windows Server NFS
Requirements
- Windows Server 2008 (R2)/Windows Server 2012 (R2)
- NFS Role Installed (NFS)
- Filezilla Installed (FTP)
Windows Step-by-Step
- Create folder C:\images
- Create folder C:\images\dev
- Set Sharing
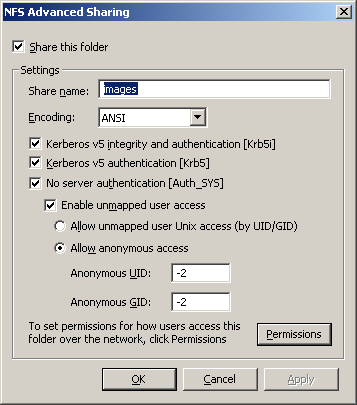
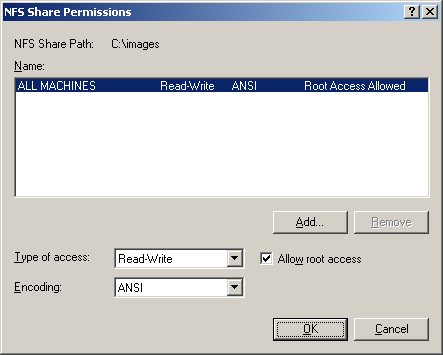
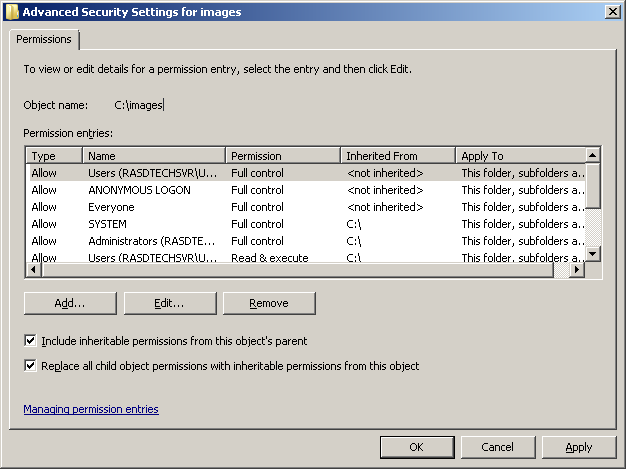
- Set Permissions: Set proper permissions for All Machines
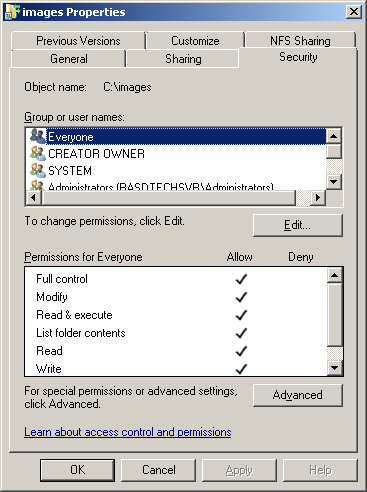
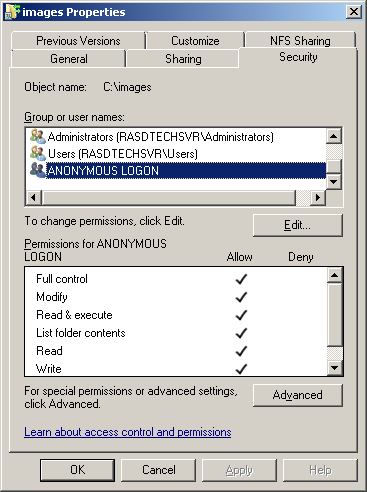
- Set Security: Make sure you do this for C:\, C:\images, and C:\images\dev
- Setup Filezilla Account: Create fog account and make sure this is the same password for your Management password
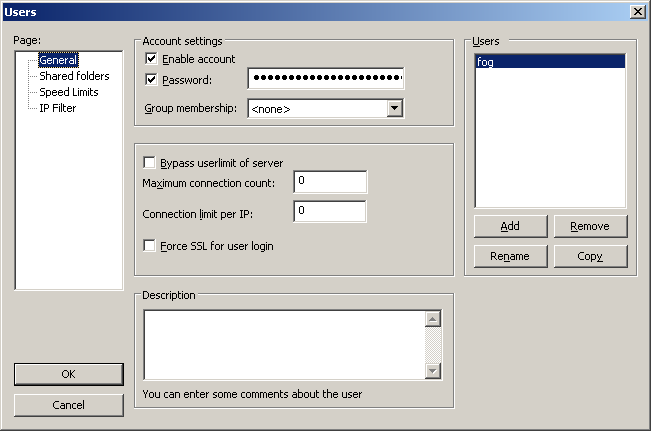 Create fog account and make sure this is the same password for your Management password
- Setup Filezilla Folders: Make sure these files $ Directories all have Read, write, delete, append rights
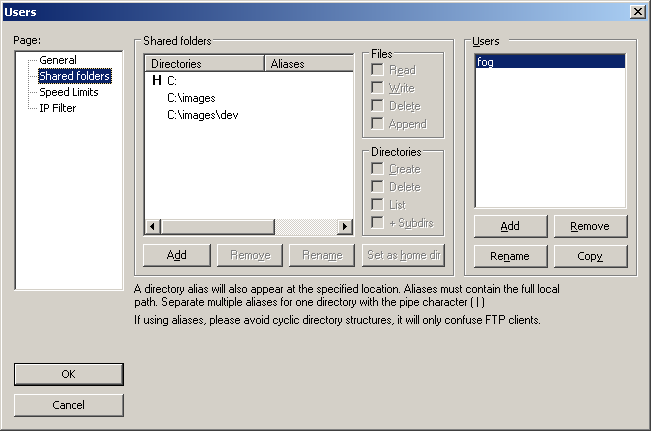 Make sure these files $ Directories all have Read, write, delete, append rights
 - Set Local Policies: Set this policy to Enabled
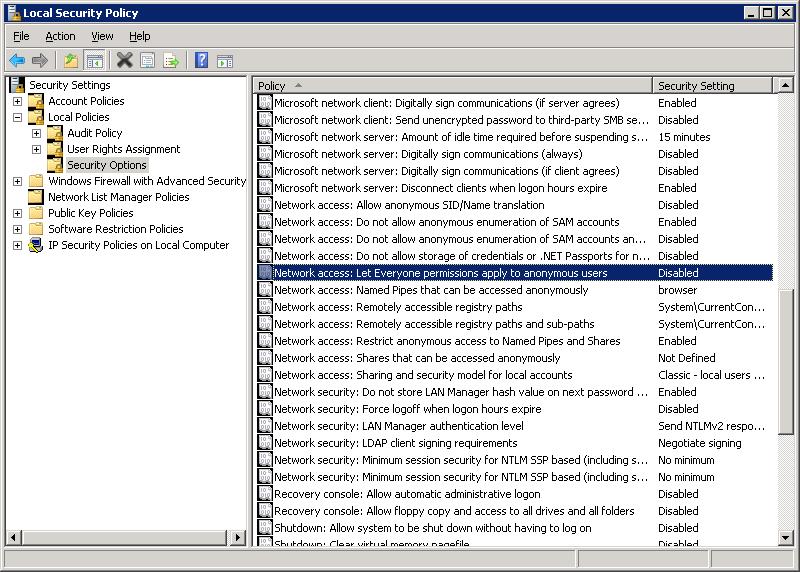 Set this policy to enabled
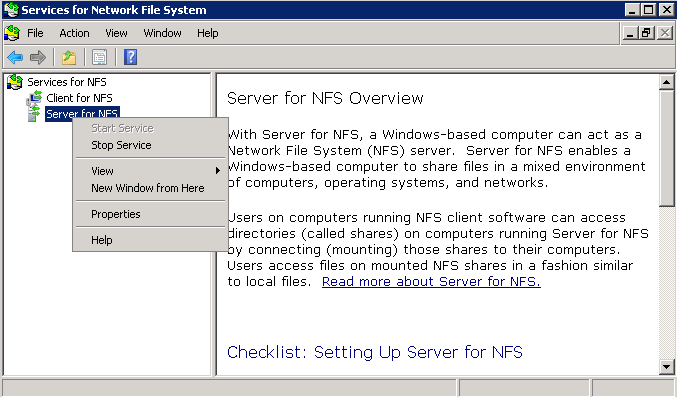
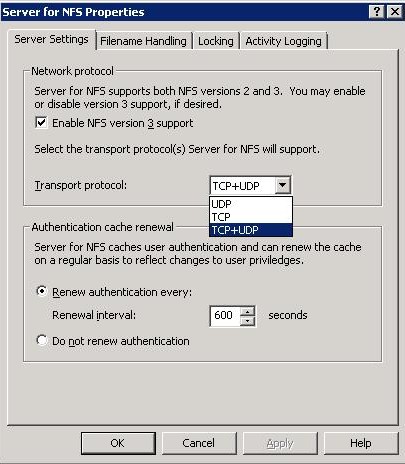
 - Configure NFS Server: Stop NFS Server Service, Edit Transport Protocol to TCP+UDP, and Start NFS Server Service


Fog Server
- Here is the tricky part.....You need to copy the hidden files on your Linux server to your windows server. These files are located @:
- /images/.mntcheck --> c:\images\
- /images/dev/.mntcheck --> c:\images\dev\
- xxx.xxx.xxx.xxx ==> ip address of the windows server
- I mounted the NFS drive and just did a cp command.
Using terminal or ssh remote:
cd /
sudo mkdir images2
sudo chmod 777 images2
sudo mount xxx.xxx.xxx.xxx:/images /images2
sudo cp /images/.mntcheck /images2
sudo cp /images/dev/.mntcheck /images2/dev/
sudo umount /images2
Fog Web GUI
- Then continue by adding a storage node just as you would in the wiki.
- I Simply added a Storage Node Definition in its own Storage Group independent to the default storage Group, added it's IP 172.19.102.6 and the path /images/ because it's the path 172.19.102.6 exports also /images/dev/ like an original FOG node does.


- This is an interesting thread to me as it shows the flexibility of FOG. While cumbersome, it CAN be "ported" to run on nearly any OS. ~ Tom Elliott Senior Developer
--Wolfbane8653.3362 (talk) 18:51, 16 June 2014 (CDT)